Big Clearance Sale - save up to 90%! SHOP NOW
Extended returns until 1 February 2025
 

iPad 4 Wi-Fi Camera Bracket Replacement

Send this link via e-mail


thumb image 1
thumb image 2

Step 1 - Front Panel Assembly (2)

  • If there's a piece of electrical tape covering the Wi-Fi antenna, speaker cable and the home button ribbon cable, remove it.

thumb image 1
thumb image 2

Step 2

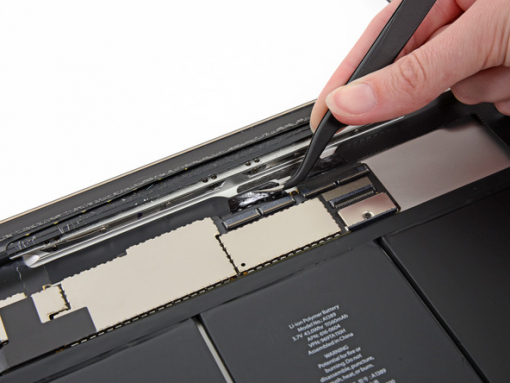
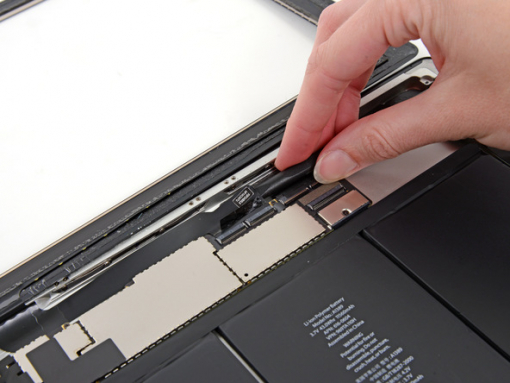
  • Lift up the flap retaining the home button ribbon cable ZIF connector.

thumb image 1
thumb image 2

Step 3

  • Pull the home button ribbon cable out of its socket on the logic board. Do this with a pair of tweezers.

Step 4

  • De-route the home button ribbon cable from its niche in the rear case.

Step 5

  • A piece of tape is securing the digitizer ribbon cable to the logic board. Peel it back with a pair of tweezers.

thumb image 1
thumb image 2
thumb image 3

Step 6

  • Lift up the retaining flap on both digitizer ribbon cable ZIF connectors.

thumb image 1
thumb image 2

Step 7

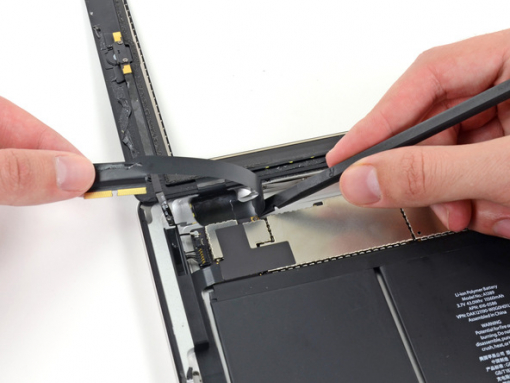
  • Loosen the adhesive under the digitizer ribbon cable with the flat end of a spudger.

  • Take out the digitizer ribbon cable out of its sockets on the logic board.

thumb image 1
thumb image 2

Step 8

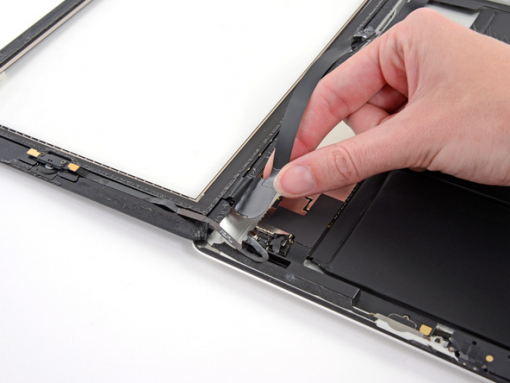
  • Peel back the digitizer ribbon cable. Separate the cable from the adhesive securing it to the rear aluminum case with the flat end of a spudger.

Step 9

  • Take the digitizer ribbon cable out of its niche in the aluminum frame. Do this with your fingers.

  • Separate the front panel from the iPad.

Step 10 - Home Button Assembly
Back to top

  • Some adhesive is holding the home button assembly and the front panel together. The best solution is to use the iOpener to soften the adhesive.

  • Microwave the iOpener for one minute only on the highest power setting.

  • Do not overheat the iOpener and wait for at least two minutes before reaheating it.

  • Put the iOpener on the home button on the front edge of the display.

Step 11

  • Peel the home button ribbon cable from the front panel gently.

thumb image 1
thumb image 2

Step 12

  • Insert the plastic opening tool underneath the right side of the home button assembly and push it upwards in order to release the adhesive there.

  • Do the same thing for the left side of the home button assembly.

  • Separate the home button mount from the front panel.

thumb image 1
thumb image 2
thumb image 3

Step 13

  • Push the edge of the plastic opening tool under the edge of the home button mounting bracket.

  • Move the plastic opening tool along the retaining spring bracket to release the adhesive.

  • Take the home button with mounting bracket off the front panel.

Step 14 - Camera Bracket
Back to top

  • Some adhesive is holding the camera bracket and the front panel together. The best solution is to use the iOpener to soften the adhesive.

  • Microwave the iOpener for one minute only on the highest power setting.

  • Do not overheat the iOpener and wait for at least two minutes before reaheating it.

  • Put the iOpener on the front facing camera on the front edge of the top of the display.

thumb image 1
thumb image 2

Step 15

  • Move the camera bracket off the adhesive securing it to the front panel with the flat end of a spudger.

  • The camera bracket should move about 2 mm to the left or to the right (depending which way you push the camera bracket).

Step 16

  • Lift up the camera bracket and remove it from the front panel.


Tools:

Parts required for
this repair