Huawei P20 Lite Screen Replacement


Step 1 - Opening Procedure
- Power off your Huawei before beginning disassembly. - Insert the thin metal opening tool between the battery cover and frame. - Flip the cover carefully to the right side of the phone. - The fingerprint ID sensor cable is attached to the back cover.
Note:
- Before you start with the repair, the battery should be discharged below 25%.
Tip:
- To loosen the glue you can warm up the battery cover. - You can use a suction cup to help you remove the battery cover.
Caution:
- If the battery is swollen, take adequate measures and precautions. - Do not heat your phone. You can use isopropyl alcohol around the edges of the back cover to weaken the adhesive. - Wear eye and hand protection when working with swollen batteries.


Step 2 - Disconnect The Battery And The Fingerprint Sensor
Back to top
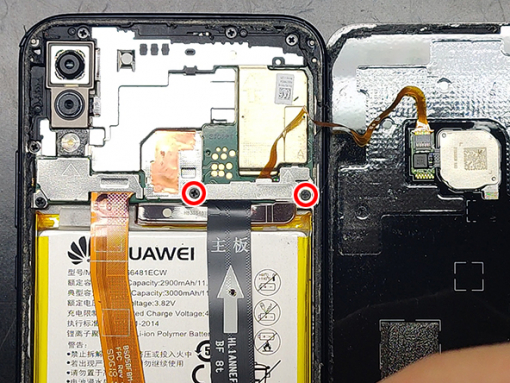
- Remove two screws securing the metal shield for the battery connector and fingerprint scanner connector. - Remove the shield and disconnect the battery and the fingerprint scanner. - Finally, disconnect the SUB board flex cable.


Step 3 - Disconnect The LCD Display
Back to top
- Remove the remaining 6 screws which hold the metal covers on the upper side of the phone. - A white dot sticker might cover one of the screws. - Remove the dot to access the screw. - Once you remove the screws, you can remove the LCD flex metal cover as well. - Disconnect the LCD flex cable. - Remove the SIM tray from the phone.


Step 4 - Remove The Main Board
Back to top
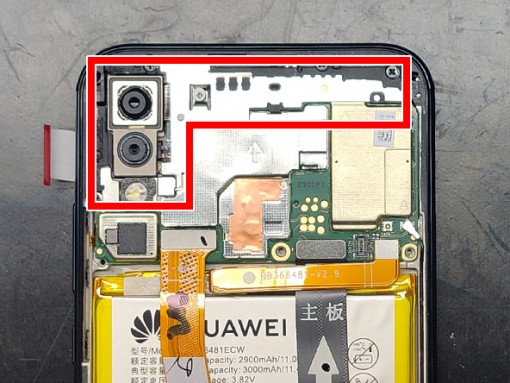
- Remove the top shield. - Disconnect and remove the front camera. - Disconnect the antenna cable carefully. - Disconnect and remove the dual main camera. - Pry and remove the main board from the phone.


Step 5 - Remove The SUB Board
Back to top
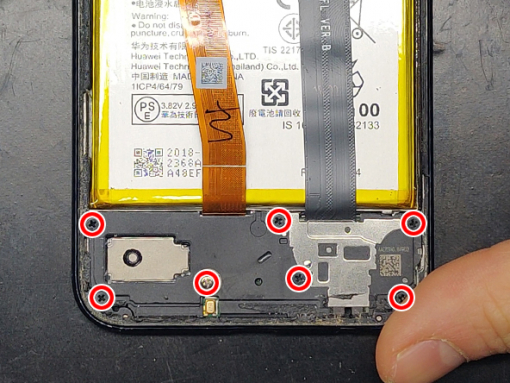
- Remove the seven screws at the bottom of the phone. - Underneath the cover is the SUB board. - Gently unclip and lift the loudspeaker unit out from the frame. - Watch out for the flex cables running underneath it. - Pry out and remove the SUB board together with the antenna and the flex cable.
Step 6 - The New LCD Assembly
Back to top
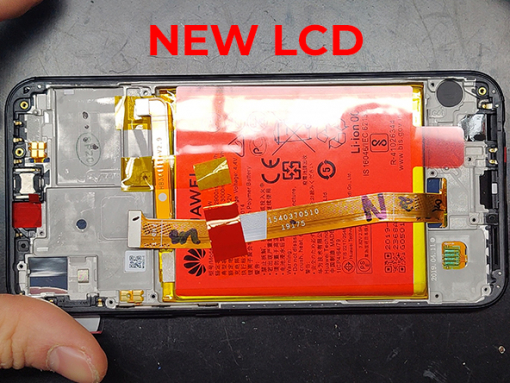
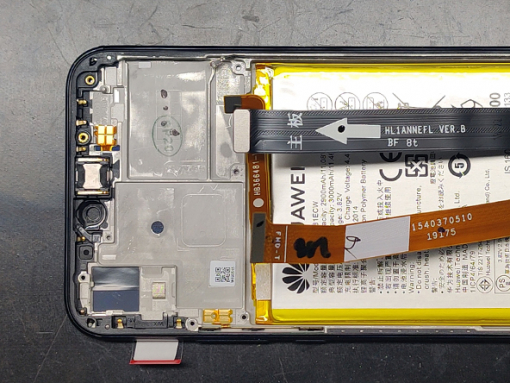
- We are using a complete LCD assembly. - That includes the LCD, the frame and the battery. - Remove all protective stickers from the sapre LCD assembly. - Insert the SUB board into the new assembly. - Tuck in the antenna into the cavity on the right side of the frame. - Insert the loudspeaker assembly and secure it with the 7 screws.


Step 7 - Insert The Main Board
Back to top
- Now insert the main board into the assembly. - Insert the main cameras and connect them to the motherboard. - Connect the LCD flex cable. - Connect the antenna cable. - Connect the SUB board flex. - Insert and connect the front camera. - Connect the battery flex cable.


Step 8 - Shields And Screws
Back to top
- Insert the top cover and secure it with 5 screws. - Insert the LCD metal shield and secure it with a single screw. - Connect the fingerprint scanner flex and cover it with the metal shield. - Secure the shield with 2 screws.


Step 9 - Battery Cover
Back to top
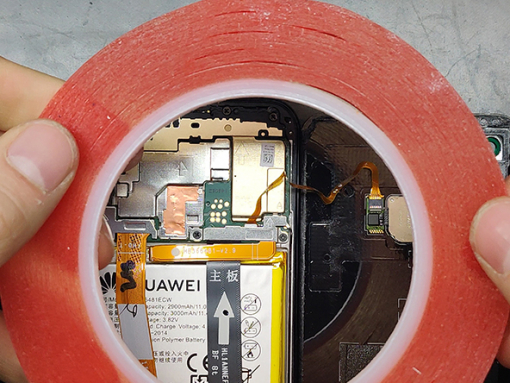
- Use double-sided adhesive tape around the edge of the phone. - Put the back cover over it and press all around the edges with your fingers. - Insert the SIM tray and switch on your device. - And you are done with the repair.


